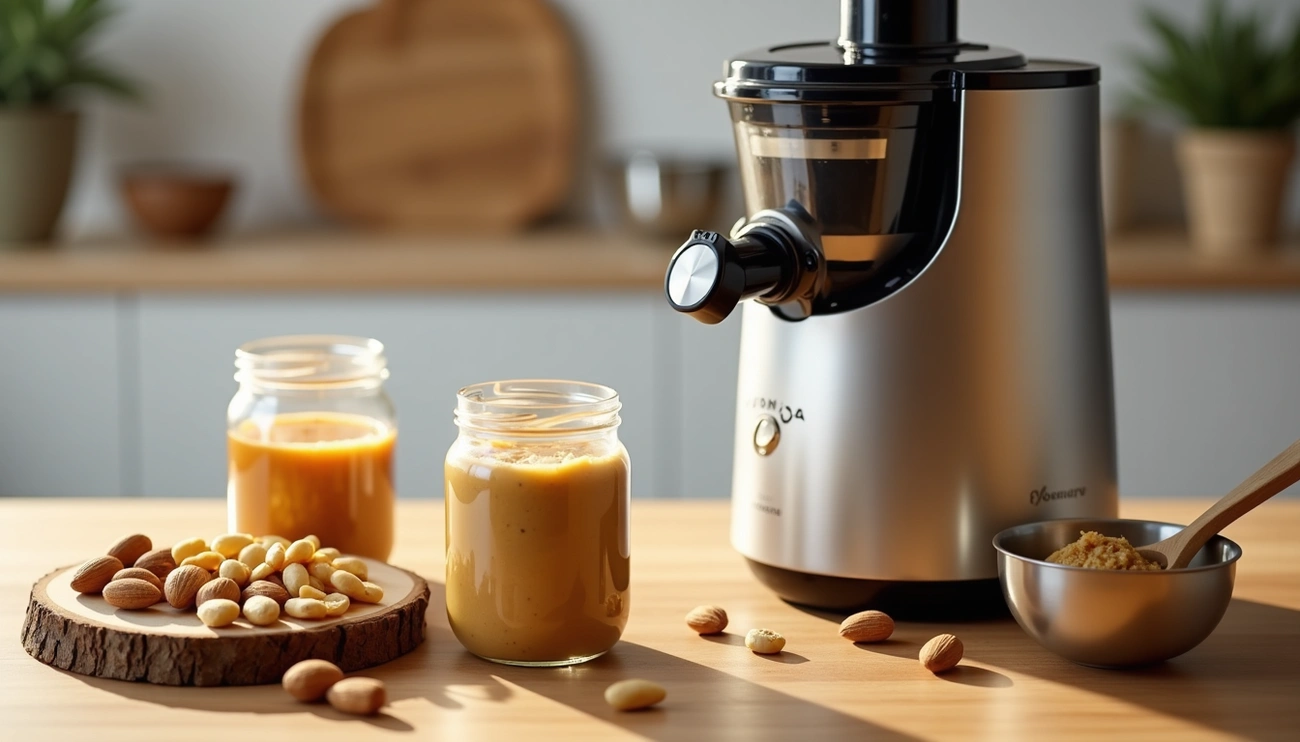
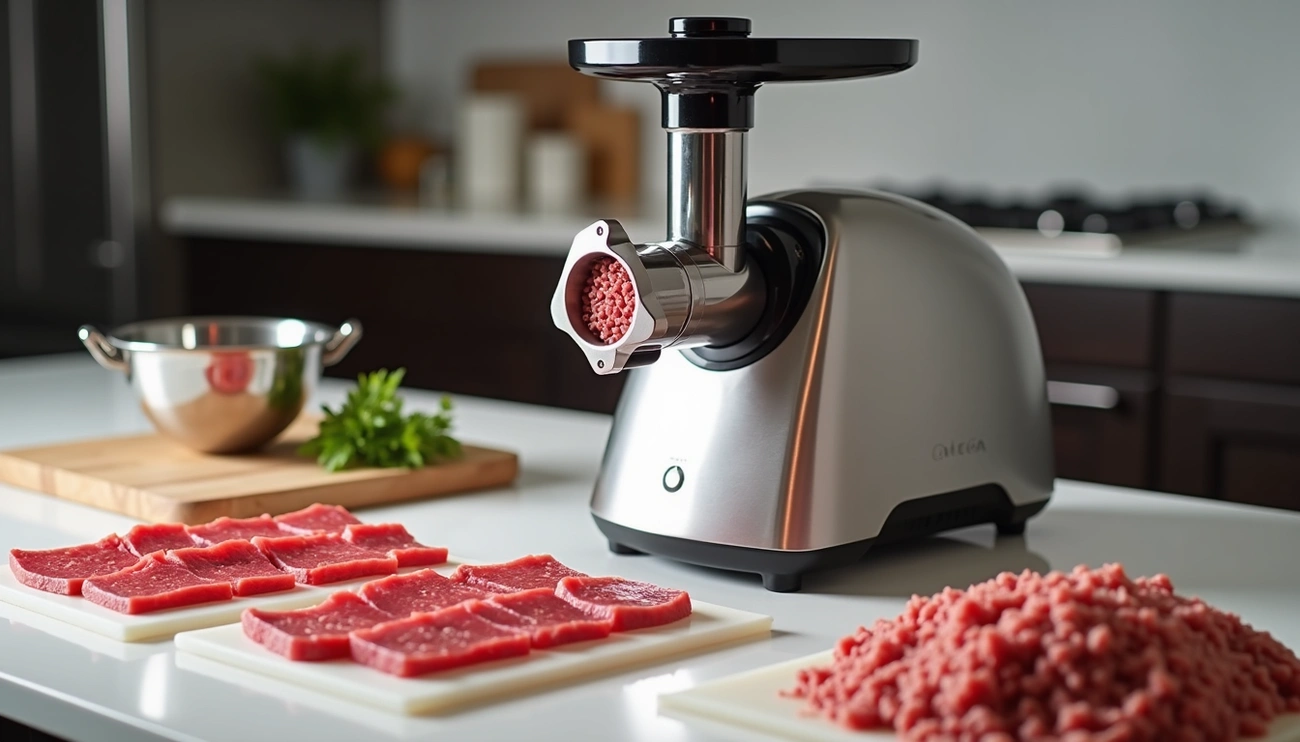
Make nut butter with an Omega horizontal juicer by installing the blank cone (homogenizer) instead of the juicing screen. Use roasted nuts for higher oil content and smoother texture. Feed nuts slowly into the chute and process them 3–5 times, using the tamper to push them through until the butter reaches a creamy consistency.
Set Up Your Omega Juicer for Nut Butter
Setting up your Omega Juicer correctly is the foundation for creating creamy, delicious homemade nut butter. The process requires changing a few components from the standard juicing setup to properly process your nuts into butter.
Choose the right cone and nozzle
The first step in preparing your Omega Juicer for making nut butter is selecting the proper components. Your juicer comes with two different cones: a juicing screen (with stainless steel mesh) and a blank cone (solid polycarbonate with a stainless steel rim). For homemade nut butter, you’ll need the blank cone.
When it comes to the nozzle, you have options. Most Omega models allow you to use either the round hole or oval hole nozzle. Some recipes mention using your “preferred nozzle”, while others note that the nozzle is optional. Generally, using one of the wider aperture nozzles works best as it allows the processed nuts to flow out smoothly.
Switch from juicing to homogenizing mode
Transforming your Omega from a juicer into a nut butter machine requires changing from juicing mode to homogenizing mode. This conversion is simple:
- Remove the juicing screen/cone that has holes
- Replace it with the solid blank cone (also called the homogenizer)
- Assemble with your chosen nozzle
- Make sure the blank end cap is in place
This setup effectively switches the function of your machine from separating juice and pulp to processing all ingredients together.
Why the blank cone matters
The blank cone is absolutely essential for making homemade nut butter. Unlike the juicing cone that separates liquid from pulp, the blank cone has no screen or holes. This solid design is crucial because:
- It prevents separation of oils from solids
- It “smashes and squishes ingredients together”
- It processes everything through the end cap hole together
- It creates the pressure needed to release oils from nuts
Furthermore, the blank cone turns your Omega Juicer into a versatile machine capable of making not just nut butters but also sorbets, baby food, and even pasta.
Without this special cone, your attempts at making homemade nut butter would result in separated components rather than the smooth, creamy texture you desire.
Prepare Your Nuts Before Juicing
Proper preparation of nuts is a crucial step in creating the perfect homemade nut butter with your Omega juicer. The way you prepare your nuts before processing can significantly impact the flavor, texture, and overall quality of your finished product.
Roast or use raw nuts?
Although you can use raw nuts for making homemade nut butter, roasting them offers several advantages. Roasted nuts provide a richer flavor, crunchier texture, and more aromatic profile. Moreover, roasting kills harmful bacteria, making your nut butter safer to consume.
For optimal results, dry roast your nuts at a low-to-medium temperature of about 284°F (140°C) for approximately 15 minutes. This temperature range helps preserve the healthy polyunsaturated fats and nutrients while enhancing flavor. If using an oven, preheat to 350°F (176°C) and roast raw nuts for 8-12 minutes until they become fragrant and slightly golden brown.
Dry roasting (without oils) is preferable to oil roasting since many commercial oil-roasted nuts use hydrogenated or partially hydrogenated oils containing unhealthy trans fats. Additionally, dry roasted nuts maintain similar fat, carb, and protein content to their raw counterparts.
Let them cool before processing
After roasting, allowing nuts to cool completely is essential before putting them in your Omega juicer. The cooling period prevents the heat from affecting other ingredients you might add and helps maintain the integrity of the natural oils.
As one experienced nut butter maker notes, “don’t use a hot nut—it needs to be cooled to room temperature. The blending process heats them up as well”. This cooling step is particularly important if you’re adding honey or other sweeteners, as adding these to hot nuts can create a sticky texture.
Seasoning tips before grinding
Enhancing your homemade nut butter with seasonings can elevate its flavor profile. Consider these options:
- Sweeteners: Most sugars work well in nut butter. Add syrups gradually to avoid creating a sticky texture.
- Spices: Almost any spice blends nicely with nut butter. Start with small amounts—about 1/2 teaspoon (less for potent spices like cayenne or clove).
- Salt: A pinch of salt enhances flavor; add it to taste after the butter becomes creamy.
For timing, add seasonings after the processing is complete and the nut butter has returned to room temperature. This prevents heat from the processing or the nuts from affecting your seasonings’ flavors and textures.
How to Make Nut Butter With Omega Juicer
The moment of truth has arrived—time to transform those prepared nuts into delicious butter using your Omega juicer. Following these specific steps ensures a smooth, creamy result.
Run nuts through 2-10 times depending on type
Different nuts require varying processing times. For peanut butter, run them through about 2-3 times until oils appear. Meanwhile, almonds typically need 7-10 passes through the machine. I’ve found that cashews fall somewhere between these ranges, yet walnuts often require fewer passes due to their naturally higher oil content.
When and how to add oil
Introducing small amounts of oil helps achieve creamier consistency. Add 1-2 tablespoons of oil slowly between batches of nuts. For specific recipes, consider adding a teaspoon of oil to one of your later rounds of ground nuts. Coconut, grape seed, or even complementary nut oils work excellently.
How to adjust texture and consistency
For smoother texture, simply:
- Process multiple times (2-3 passes minimum)
- Run until natural oils begin to release
- Gradually add oil between batches if needed
Troubleshooting common issues
Should your butter remain too crumbly, the nuts likely haven’t released their oils yet. Consequently, process them longer. If the auger stops working, press the [Rev] button for 3-5 seconds, release, then repeat 2-3 times. Through this technique, the machine pushes ingredients upward to release food clogs.
Storing and Using Your Homemade Nut Butter
Once you’ve created your perfect batch of homemade nut butter, proper storage becomes essential for maintaining its freshness and flavor.
How to store homemade nut butter
For optimal freshness, store your homemade nut butter in a cool, dry place away from direct sunlight and heat. Refrigeration is highly recommended for homemade varieties since they lack preservatives found in commercial products. Keep your jar tightly sealed after each use and always use clean utensils to prevent introducing moisture or contaminants.
To manage the natural oil separation that occurs, try storing your jar upside down and flipping it each time you use it—this simple trick helps maintain consistent texture throughout.
How long does homemade nut butter last
Without preservatives, homemade nut butter has a notably shorter shelf life than commercial varieties. When refrigerated, expect it to last approximately one month. Alternatively, freezing can extend its lifespan up to three months.
Watch for signs of spoilage including mold, discoloration, or a soapy/bitter smell indicating rancidity. Indeed, these changes signal it’s time to discard your nut butter.
Creative ways to use your nut butter
Beyond traditional toast toppings, consider these versatile applications:
- Drizzle over sweet potatoes or pancakes
- Blend into smoothies for added healthy fats
- Create energy bites or homemade protein bars
- Whisk into sauces or salad dressings
- Mix into oatmeal or yogurt parfaits
Conclusion
Making your own nut butter at home with an Omega juicer truly transforms the way we think about this pantry staple. Throughout this guide, we’ve covered everything from proper machine setup to creative ways to enjoy your finished product. The process, as you’ve seen, requires minimal effort yet yields exceptional results.
Homemade versions offer undeniable advantages over store-bought alternatives. First and foremost, you control every ingredient that goes into your butter. Additionally, the freshness factor simply cannot be matched by commercial products sitting on grocery shelves for months.
The versatility of your Omega juicer extends beyond just creating basic nut butter. After all, once you master the fundamentals, endless flavor combinations await your experimentation. Try mixing different nuts or adding spices like cinnamon or vanilla for unique variations that match your exact preferences.

